Zaurus Development on Mac
This is a guide to setting up a development environment on an Intel based Mac. It's quite easy to do; it's just a question of installing the right files in the right locations.
Here are the installation steps in summary,
- Set up a cross compiler to generate ARM binaries
If you only want to create simple command line tools then this will be enough to compile software for any 2.4 kernel based ROM - Get the Sharp Zaurus SDK for Zaurus specific libraries that will allow you to access Zaurus functions such as setting the LEDs and detecting the orientation of the screen
- Set up the QT Palmtop Environment (QPE) and QT Embedded (QTE) SDKs
- Set up QT tools for Mac that are used when designing and building a GUI for a QT application
- Set up tmake, a script for dealing with QT project files
- Make a script to automate set up when you want to build
Note: When a Linux distribution is installed on Zaurus NAND memory, it is common practice to refer to it as a "ROM" because during normal usage it is mounted read only.
Before Writing Zaurus Software
When creating a new application for the Zaurus I usually begin by writing a prototype application on desktop Linux using QT3. Debugging by gdb and valgrind are much easier than trying to debug on the Zaurus itself. I then port from QT3 to QT2 when I target the Zaurus. Some bugs can only be encountered when using the target platform so I have found myself running gdb and strace on the Zaurus.
On a Mac, QT3 is not available, however, you may wish to target QT3 for Zubuntu or Debian on Zaurus. If you prototype on a Mac you will have to do it in QT4. This will make porting to QT2 for the Sharp ROM more difficult.
On the Sharp ROM, note that QTextEdit is completely absent. You will also notice
that QPainter has been compiled without transforms. Config
is used instead of QSettings. It's not all bad though, you get QCop
that can be used to send messages to other applications. There are some special classes for handling font
selection instead of using a dialog. File dialogs are also missing but there
are the FileSelector and DocLnk objects in their place, the documentation for
this bit is poorly written so I've never used them. But do look for Qtopia specific classes as
they make the application more Zaurus-like.
Installation
Apart from the cross compiler, we're going to put together all our dev files in a directory I'll call
BuildSystem. So first, decide where you want to keep BuildSystem. On my drive it lives at
~/Zaurus/BuildSystem and I keep my Zaurus projects in ~/Zaurus/ProjectName
When you have set up everything and tested it; you can move things around to fit your tastes.
Cross Compiler
You need a cross compiler to build binaries for ARM on a Mac: Download Xtoolchain from QuantumSTEP. Direct link to Intel package.
Extract the archive, it will go directly into /Developer/...
tar xvfz i386-apple-darwin_gcc-2.95.3-glibc-2.2.2_arm-quantumstep-linux-gnu.tgz
I was quite surprised that the archive has an absolute path. If you want to change the destination to a local path, you can rewrite it to remove the first slash like this:
gzip -d i386-apple-darwin_gcc-2.95.3-glibc-2.2.2_arm-quantumstep-linux-gnu.tgz
pax -r -s ',^/,,' -f i386-apple-darwin_gcc-2.95.3-glibc-2.2.2_arm-quantumstep-linux-gnu.tar
The QT files that come with Xtoolchain in /Developer/Xtoolchain/i386-apple-darwin/gcc-2.95.3-glibc-2.2.2/arm-quantumstep-linux-gnu/arm-quantumstep-linux-gnu/opt/Qtopia are built for i386 Linux so
aren't much use on a Mac. ARM files are included in the Sharp directory however we
also want to install the Sharp libraries so we're going to get the Sharp SDK in the next step
and that includes the same files: You can go ahead and delete the Qtopia directory now.
Sharp SDK
Now we're going to
- Get the final Sharp SDK
- Make a directory SharpSDK and uncompress it there
We're going to download the SDK using curl.
cd ~/Zaurus/BuildSystem
mkdir SharpSDK
cd SharpSDK
curl -O http://support.ezaurus.com/developer/doc/reference/20021227/sharpsdk-pub-20021227.tar.gz
tar xvfz sharpsdk-pub-20021227.tar.gz
QPE and QTE
It's time to set up Qtopia. Let's make a directory to keep important sources in:
mkdir ~/Zaurus/BuildSystem/Sources
Download qtopia-free-1.6.1.tar.gz and qt-embedded-2.3.2.tar.gz from the
Sourceforge Qt Palmtop Environment
files page.
Uncompress these archives in the Sources directory:
cd ~/Zaurus/BuildSystem/Sources
tar xvfz qtopia-free-1.6.1.tar.gz
tar xvfz qt-embedded-2.3.2.tar.gz
Now, let's hook up some nice links to QPE:
cd ~/Zaurus/BuildSystem
mkdir QPE
cd QPE
ln -s ../SharpSDK/sharp/lib lib
ln -s ../Sources/qtopia-free-1.6.1/include include
Now we're going set up QT embedded and the Sharp support libraries.
Make a directory for QT embedded:
mkdir ~/Zaurus/BuildSystem/QT2
Again we'll set up some nice links:
cd ~/Zaurus/BuildSystem/QT2
ln -s ../SharpSDK/sharp/lib lib
ln -s ../Sources/qt-2.3.2/include include
We also have some QT2 tools that run on Mac and are needed for the build process. moc is the meta object compiler, uic is the user interface compiler for .ui files and designer is a GUI layout program. Download qt2-mactools.tbz and uncompress here:
cd ~/Zaurus/BuildSystem/QT2
tar xvfj qt2-mactools.tbz
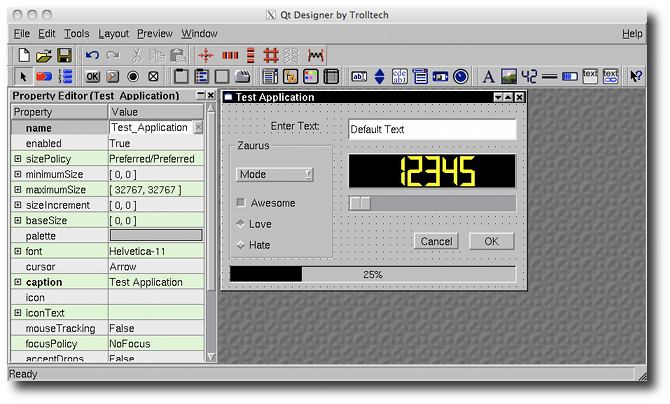
Designer: They don't make GUIs like this any more
tmake
In order to compile for QT you need to use the tmake system. tmake is a Perl script that will generate a Makefile and all the dependencies for QT. It is not a good idea to skip tmake and think that you are going to manually write a makefile because you need to use the meta object compiler to process all the macros that make QT's signals and slots system work. Use tmake, it's easier.
Download the tmake configuration files: tmake-arm.tbz and install as follows:
tar xvfj tmake-arm.tbz
cp -r macx-sharp-g++ ~/Zaurus/BuildSystem/SharpSDK/tmake/lib/qws
When using the dev environment, tmake is quite easy to use.
Create a project file, e.g. foobar.pro and then
tmake foobar.pro > Makefile
tmake will be in your path after running the dev script given below. More documentation for tmake can be found online, also look at the documentation for qmake which is very similar.
Development Script
Copy and paste this code into a file, and save it as dev-arm-mac.sh
#!/bin/bash
ZSDKHOME=/Users/lyndon/Zaurus/BuildSystem
CROSSCOMPILE=/Developer/Xtoolchain/i386-apple-darwin/gcc-2.95.3-glibc-2.2.2/arm-quantumstep-linux-gnu
QPEDIR=$ZSDKHOME/QPE
QTDIR=$ZSDKHOME/QT2
PATH=$QTDIR/bin:$CROSSCOMPILE/bin:$PATH
TMAKEPATH=$ZSDKHOME/SharpSDK/tmake/lib/qws/macx-sharp-g++/
DYLD_LIBRARY_PATH=$QTDIR/maclib:$DYLD_LIBRARY_PATH
PS1='!sharp-dev-arm:\u@\h:\w\$ '

export QPEDIR QTDIR PATH TMAKEPATH DYLD_LIBRARY_PATH PS1 ZSDKHOME
- Edit the second line to point ZSDKHOME at your BuildSystem directory
- If you didn't install the cross compiler in
/Developerthen edit CROSSCOMPILE to point at the new location - You probably want to trim the PS1 line after you've tried the script. For example, maybe delete the section ":\u@\h"
Keep this script in your BuildSystem directory unless you have a better place. Now whenever you want to do some development work, open a terminal and do a
source ~/Zaurus/BuildSystem/dev-arm-mac.sh
All the paths will be set up for tmake, gcc, QT, etc.
Add the following lines to your project files when you compile for Zaurus:
INCLUDEPATH     += $(QPEDIR)/include
LIBS            += -lqpe
I assume you'll know when to add libsl etc. to the LIBS line.
Expansion
We're going to add a couple of directories for future expansion:
mkdir ~/Zaurus/BuildSystem/include
mkdir ~/Zaurus/BuildSystem/lib
Now, when you build a library for your Zaurus, install it into lib and the header
files to include. When you are writing a project file using libfoo that
you installed this way, add the following lines:
INCLUDEPATH     += $(ZSDKHOME)/include
LIBS            += -L$(ZSDKHOME)/lib -lfoo
Documentation
Open your web browser and using the open file menu option, open
BuildSystem/Sources/qtopia-free-1.6.1/doc/index.html and bookmark it.
Post Installation: Testing Your Application
So you've followed the steps above, you can now build an application for your Zaurus. Great, now let's test it.
Transfer the binary to your Zaurus and run the program from the shell. If you do it this way, you won't be able to switch apps using Qtopia because there won't be an icon for your program on the task bar. As soon as you get rid of the basic bugs then set up the .desktop file and an icon. Now when you run it, it will appear in the taskbar even if you start it from the shell.
Finally strip the binary using arm-quantumstep-linux-strip, build an ipkg file
using ipkg-build.sh and test the ipk as an installable file.
Generic Approach to Building Open Source Software
- Download and uncompress the source archive.
- Source the dev script:
source ~/Zaurus/BuildSystem/dev-arm-mac.sh - Check options for configure:
./configure --help - Configure. You can often use the
--hostparameter.
For example, to build ncurses I used:./configure --host arm-quantumstep-linux-gnu --with-shared - Check the Makefile uses the correct compiler tools for Zaurus, for example, lines
such as
STRIP = stripshould beSTRIP = arm-quantumstep-linux-gnu-strip. Other tools to look for are ar, gcc, g++, nm, ranlib - Build using
make - When building libraries, the shared object files from the make process are often temporarily placed in
a hidden directory called
.libs, sometimes with the source, e.g.src/.libsso that make install will copy them to/usr/locallater. - Test the program.
- Make an ipkg.