Building 3D Models from Real World Data
Introduction
Building a 3D reconstruction (map or model) of something can be achieved using several techniques; one of which is Structure from Motion and another is SLAM.
Structure from Motion (SfM) finds features in views from a camera moving through a scene; matches corresponding points; triangulates them and determines the pose of each view. The matching points are used to form constraints on the camera pose estimates and 3D point position estimates.
The collection of 3D features form the model as a point cloud. Meshing algorithms can be used to develop a mesh based version of the model. Structure from Motion is the method used in photogrammetry.
In SLAM (Simultaneous Localisation and Mapping), the features are extracted from the views and the pose and triangulation of each point is estimated iteratively as each view is added to the scene. This is performed "live" compared to Structure from Motion which is performed as a post process.
SLAM has the advantage of arriving at a model live or nearly live and it is possible to make decisions about where more images should be captured to improve the model. SLAM has less constraints in the early stages of building the model so can be inaccurate until more images are captured. Global model optimisation can fall into local minima that may be difficult to escape from, back to a true model.
In capturing data for both SfM and SLAM, it is important to form loops - returning to previous locations so that loop closures can eliminate drift.
Note that in this description the terms "views" and "camera" are used but other sensors such as LIDAR, SONAR or less conventional sensors such as event cameras may be used.
Implementation
COLMAP is an open source Structure from Motion application that is easy to use with a little guidance. Instructions for installing COLMAP are beyond the scope of this demonstration.
The workflow is as follows:
- Capture suitable video
- Extract images from the video
- Extract features from images
- Match features
- Perform sparse reconstruction
- Export a ply file of the sparse point cloud
- Optional: perform a dense reconstruction
More details for the method can be found in the original papers the code was based on.
Example
Create a COLMAP project and extract images from a video:
setup.sh project_directory myvideo.mp4By default, this script extracts images at 5 fps and 1280×720. This is a little bit low resolution but the next steps are very computationally demanding and may hit the limit on available memory. If you are working on a high spec computer you may wish to raise the resolution. Frame rate is more dependent on how fast the camera was moving during capture.
Run COLMAP to perform sparse reconstruction:
runcolmap.sh project_directory(Optional) Run COLMAP to perform dense reconstruction:
dense.sh project_directoryPoint clouds can be viewed in MeshLab or CloudCompare, amongst other tools.
Additonal Notes
- Sparse reconstruction (runcolmap.sh) can be slow (from 30 minutes to several hours depending on the number of images and content),
- Dense reconstruction (dense.sh) can be very slow - hours to days depending on the number of images and resolution
I captured a video while walking in a circle around the Exploration Statue in Bristol, using a GoPro camera, in portrait orientation:
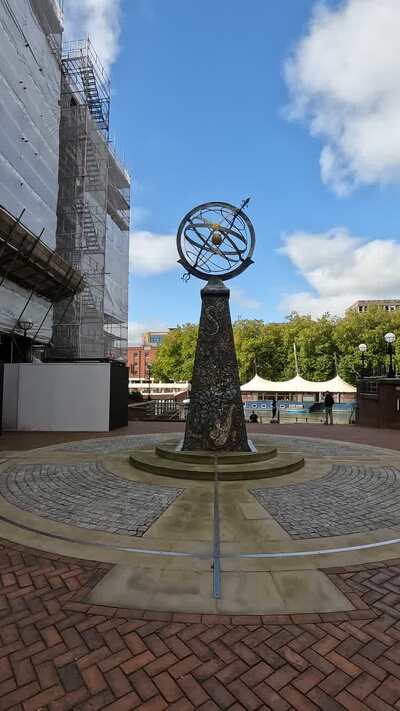
Frame from Video Capture
This should be a challenging model to reconstruct due to the details in the top part of the statue.
The point cloud shows a lot of noise. It is common with photogrammetry to have to clean up the point cloud to remove outliers and noise. Sparse reconstruction took around 30 minutes. Image registration and optimisation in COLMAP is currently single threaded and runs on CPU so this phase is particularly slow.
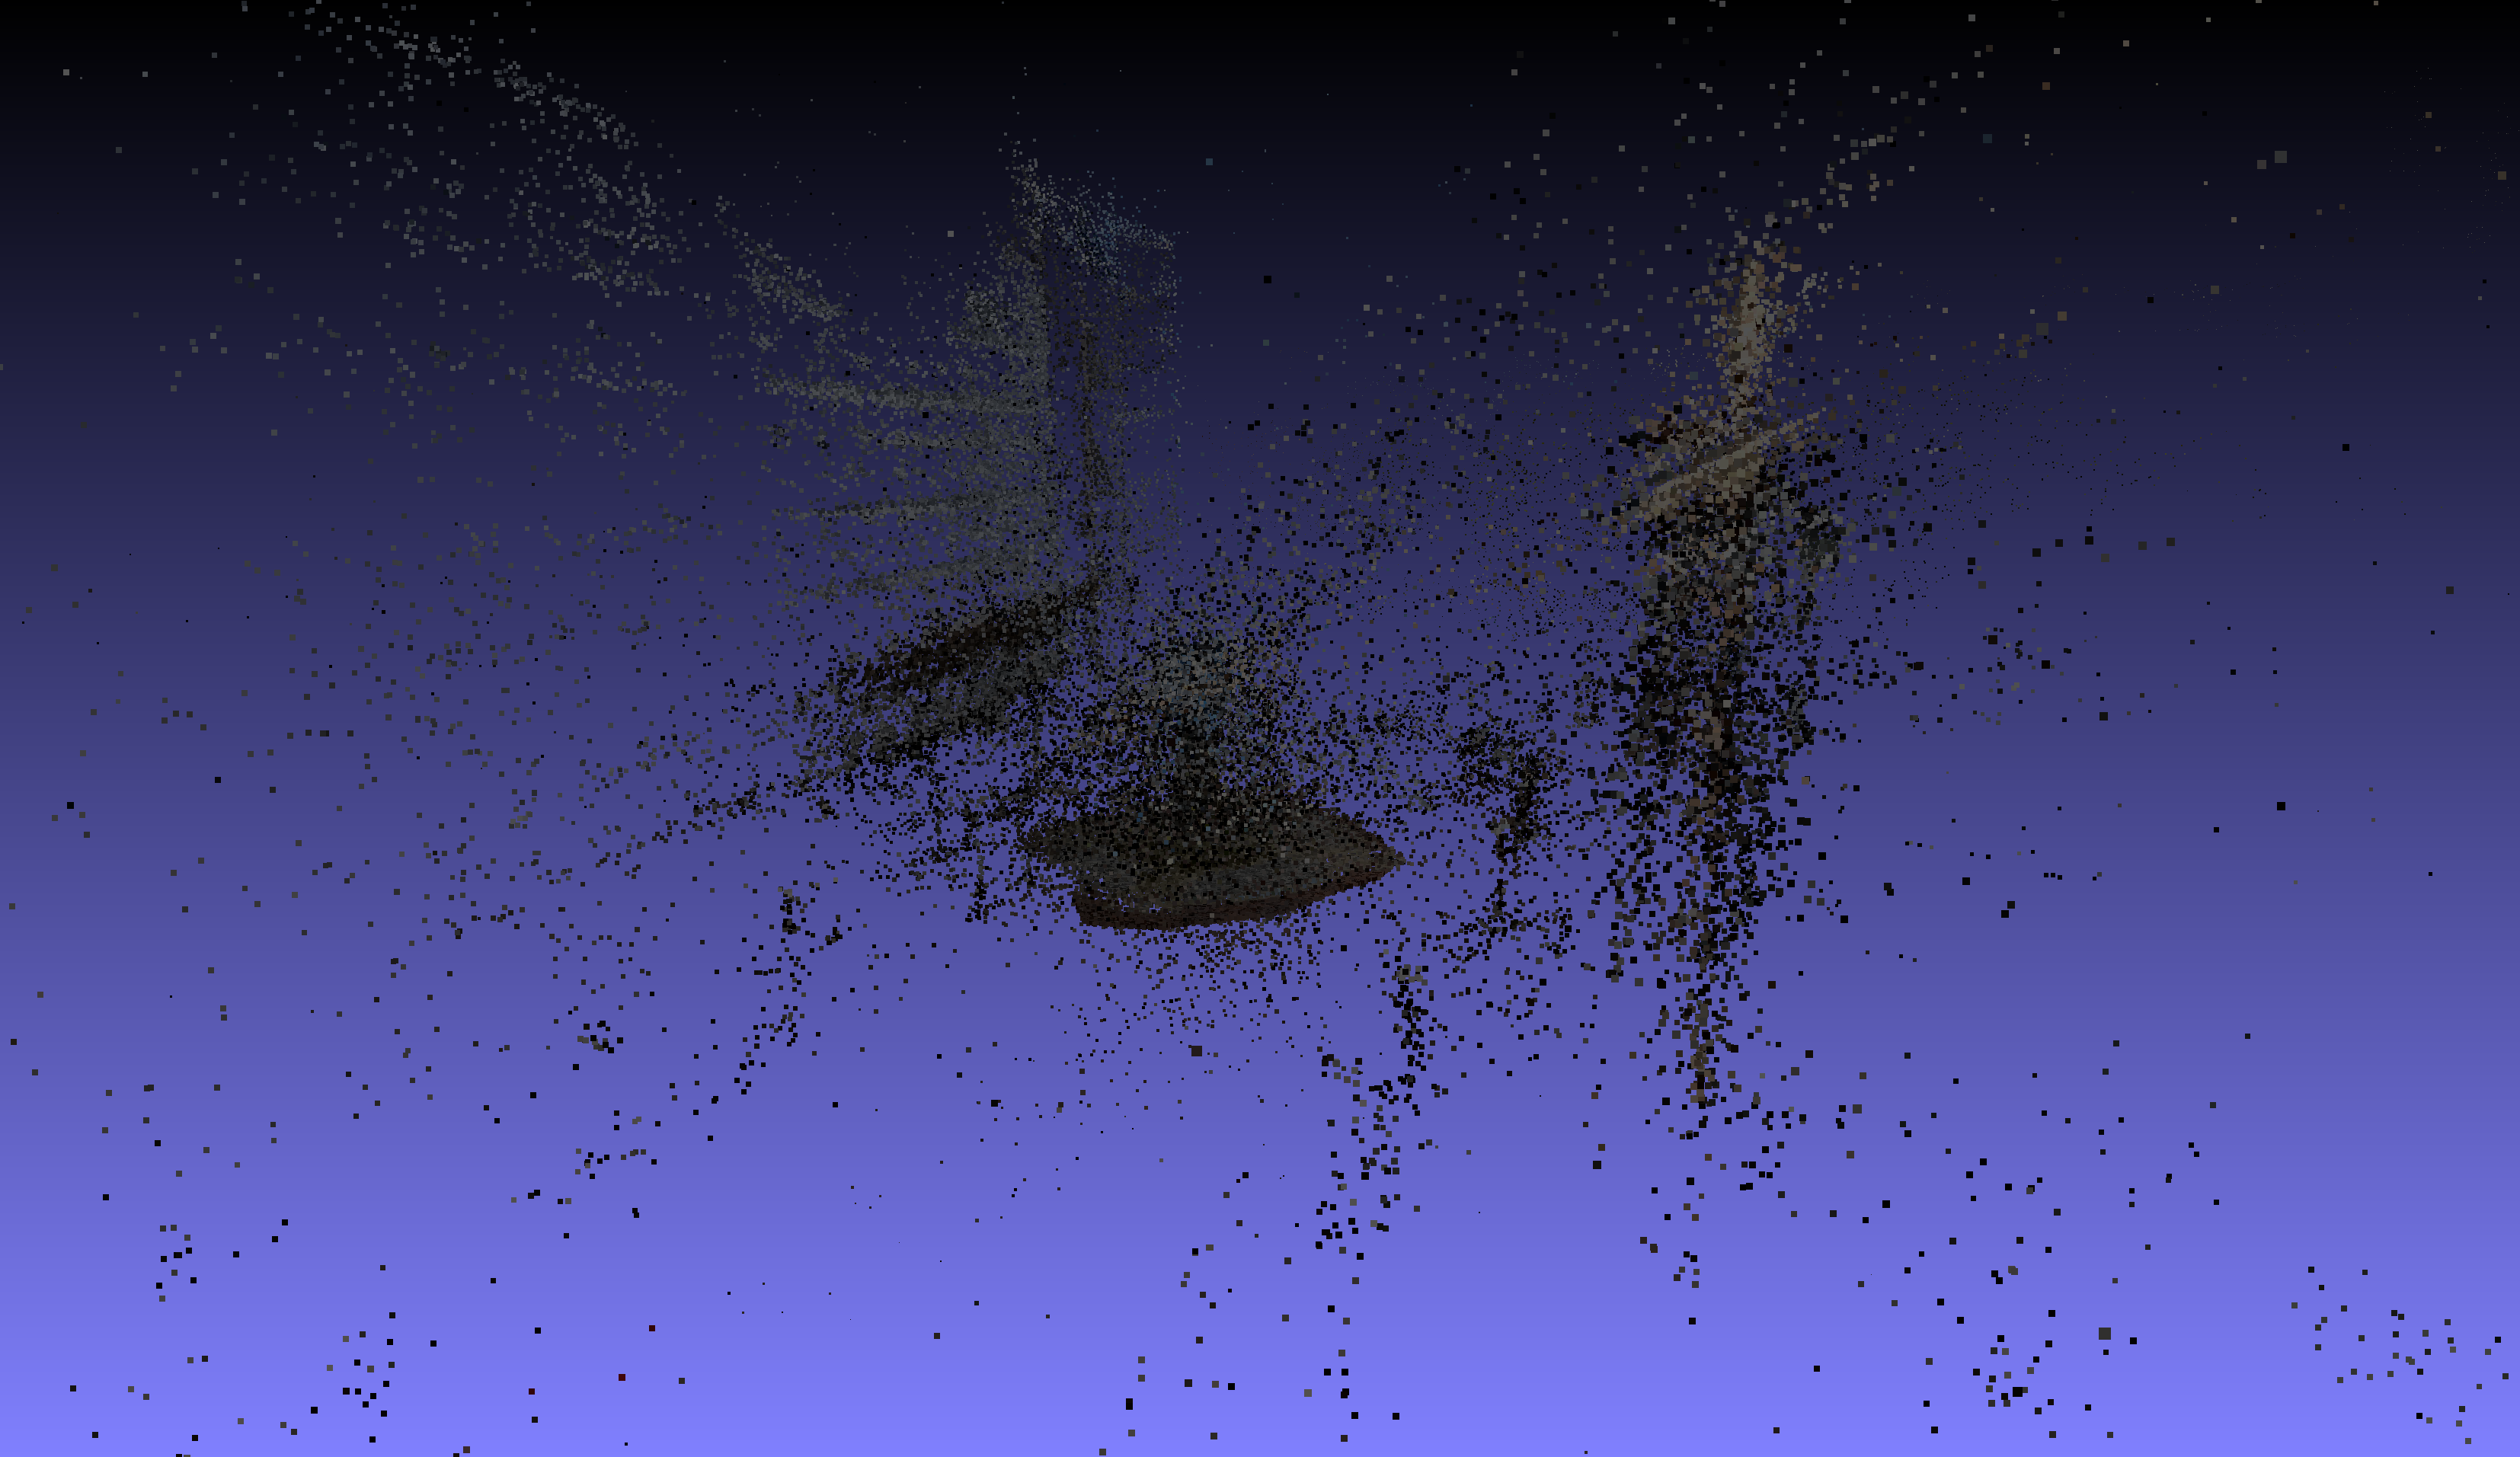
Sparse Point Cloud
The dense reconstruction took around 1.5 hours on a desktop PC with a Ryzen 5 and RTX3060 GPU.
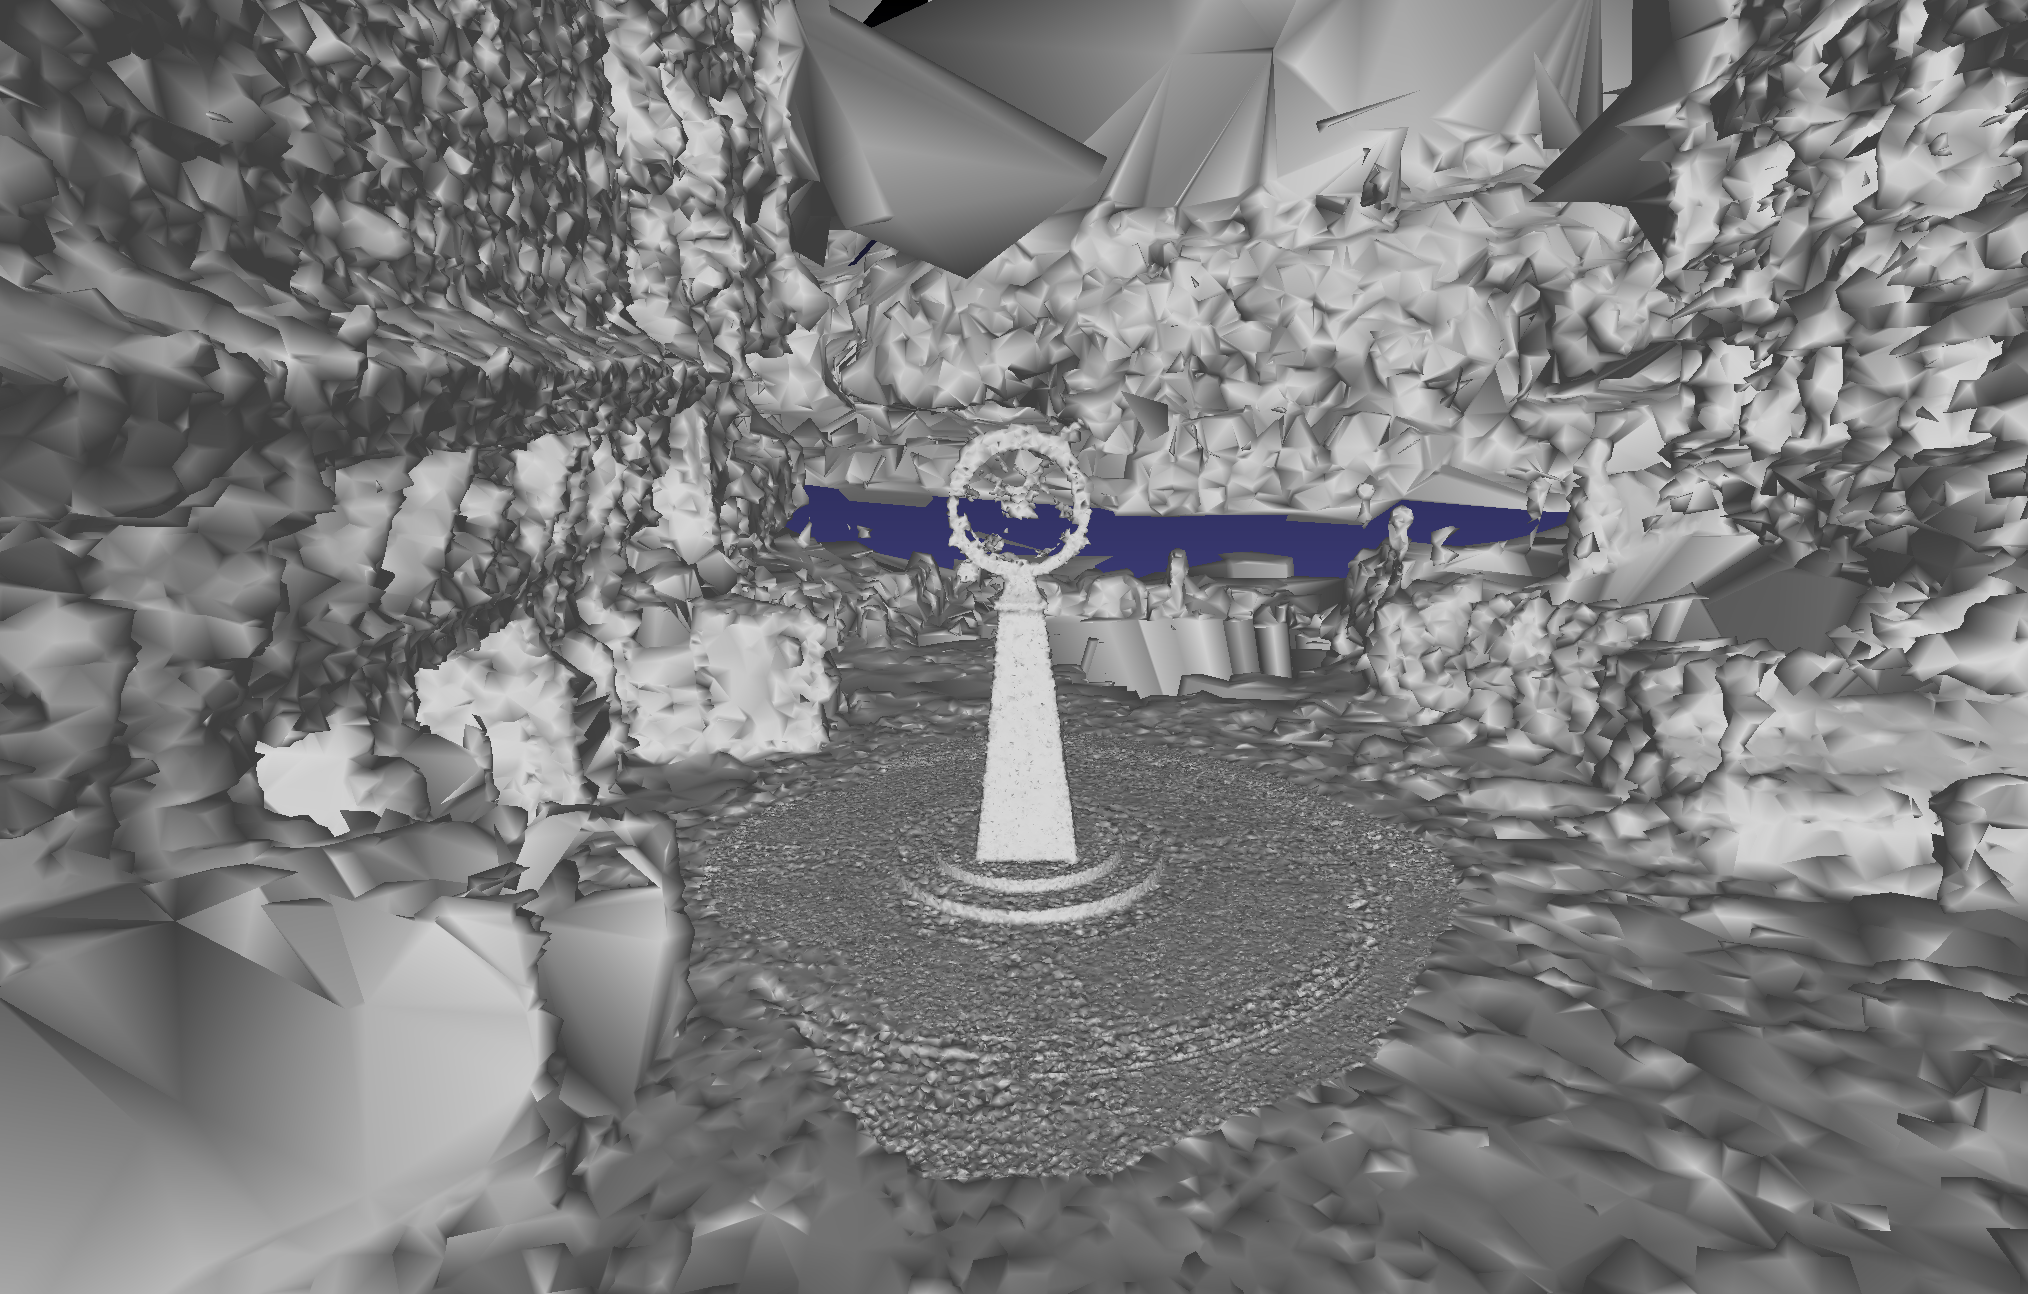
Dense Reconstruction with Delaunay Triangulation
Using OpenMVS to Improve COLMAP Reconstructions
Although this dense reconstruction is good for the resolution of the input, using OpenMVS tools we can improve a sparse reconstruction in a lot less time.
It is assumed that you can figure out how to install OpenMVS, but to build a docker image, here is a quick guide to what worked for me:
git clone https://github.com/cdcseacave/openMVS.git
cd openMVS/docker
./buildFromScratch.sh --cuda --master --workspace /data
I had to edit buildFromScratch.sh to change the BASE_IMAGE in CUDA_BUILD_ARGS to a version number that would work with my system. I also had to set CMAKE_CUDA_ARCHITECTURES to the specific value for my GPU.
You only need a sparse reconstruction from COLMAP but if you created a dense reconstruction then some of the data can be reused. Otherwise we need undistorted images:
prepomvs.sh project_directoryThis script will only generate the undistorted images if they do not exist already so is always safe to use. As a docker image was built for this project, the prepomvs.sh script is separate so it can be run outside the docker container.
Run OpenMVS tools on a COLMAP project,
runomvs.sh project_directoryIt will take some time to run all the tools. Here are some images generated from the various files produced by the script:
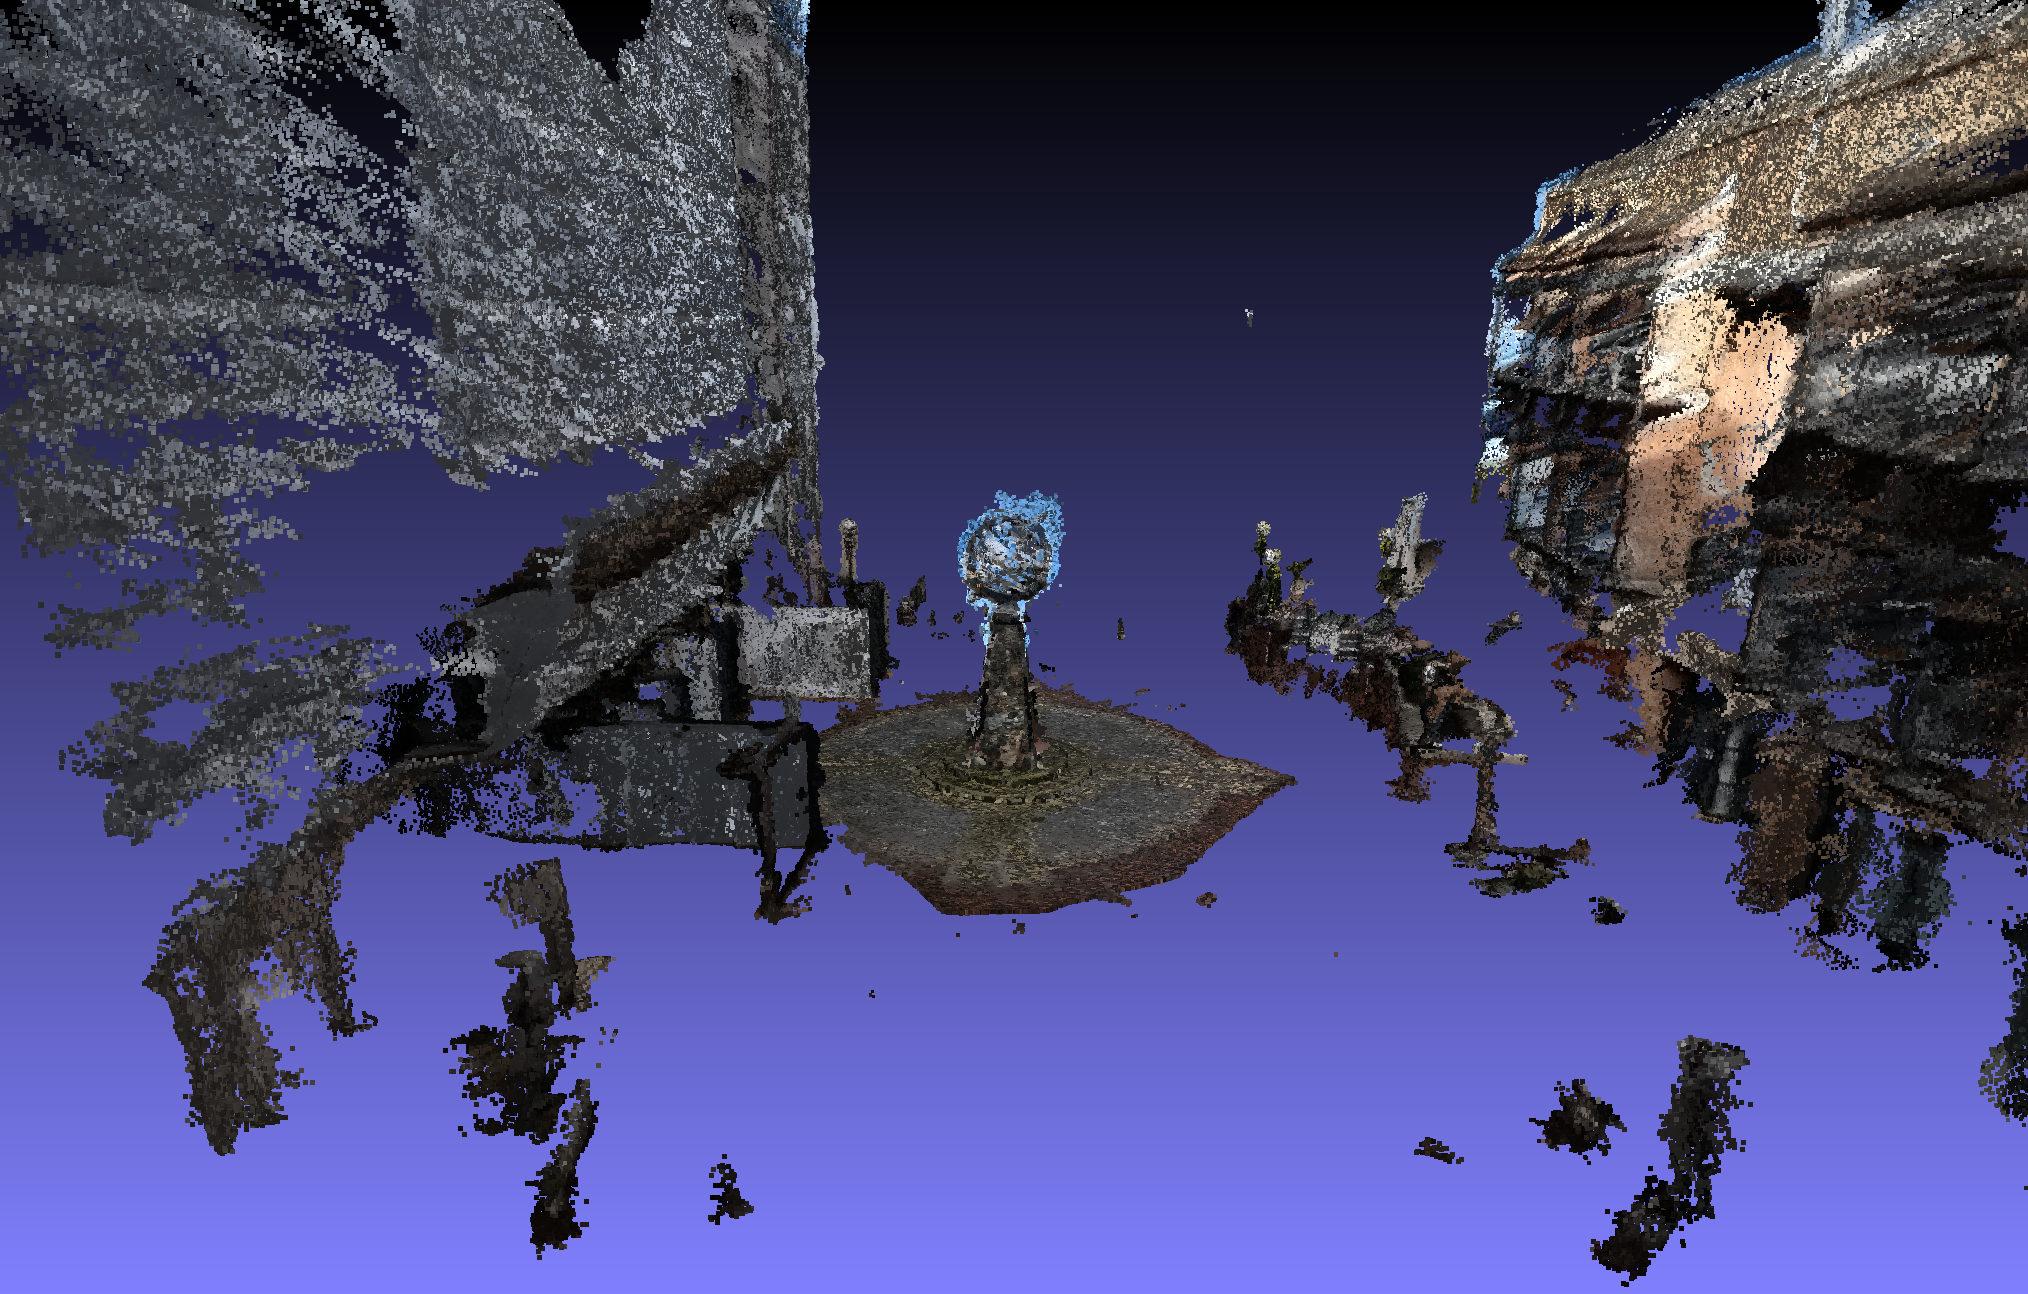
Densified Point Cloud

Reconstructed Mesh
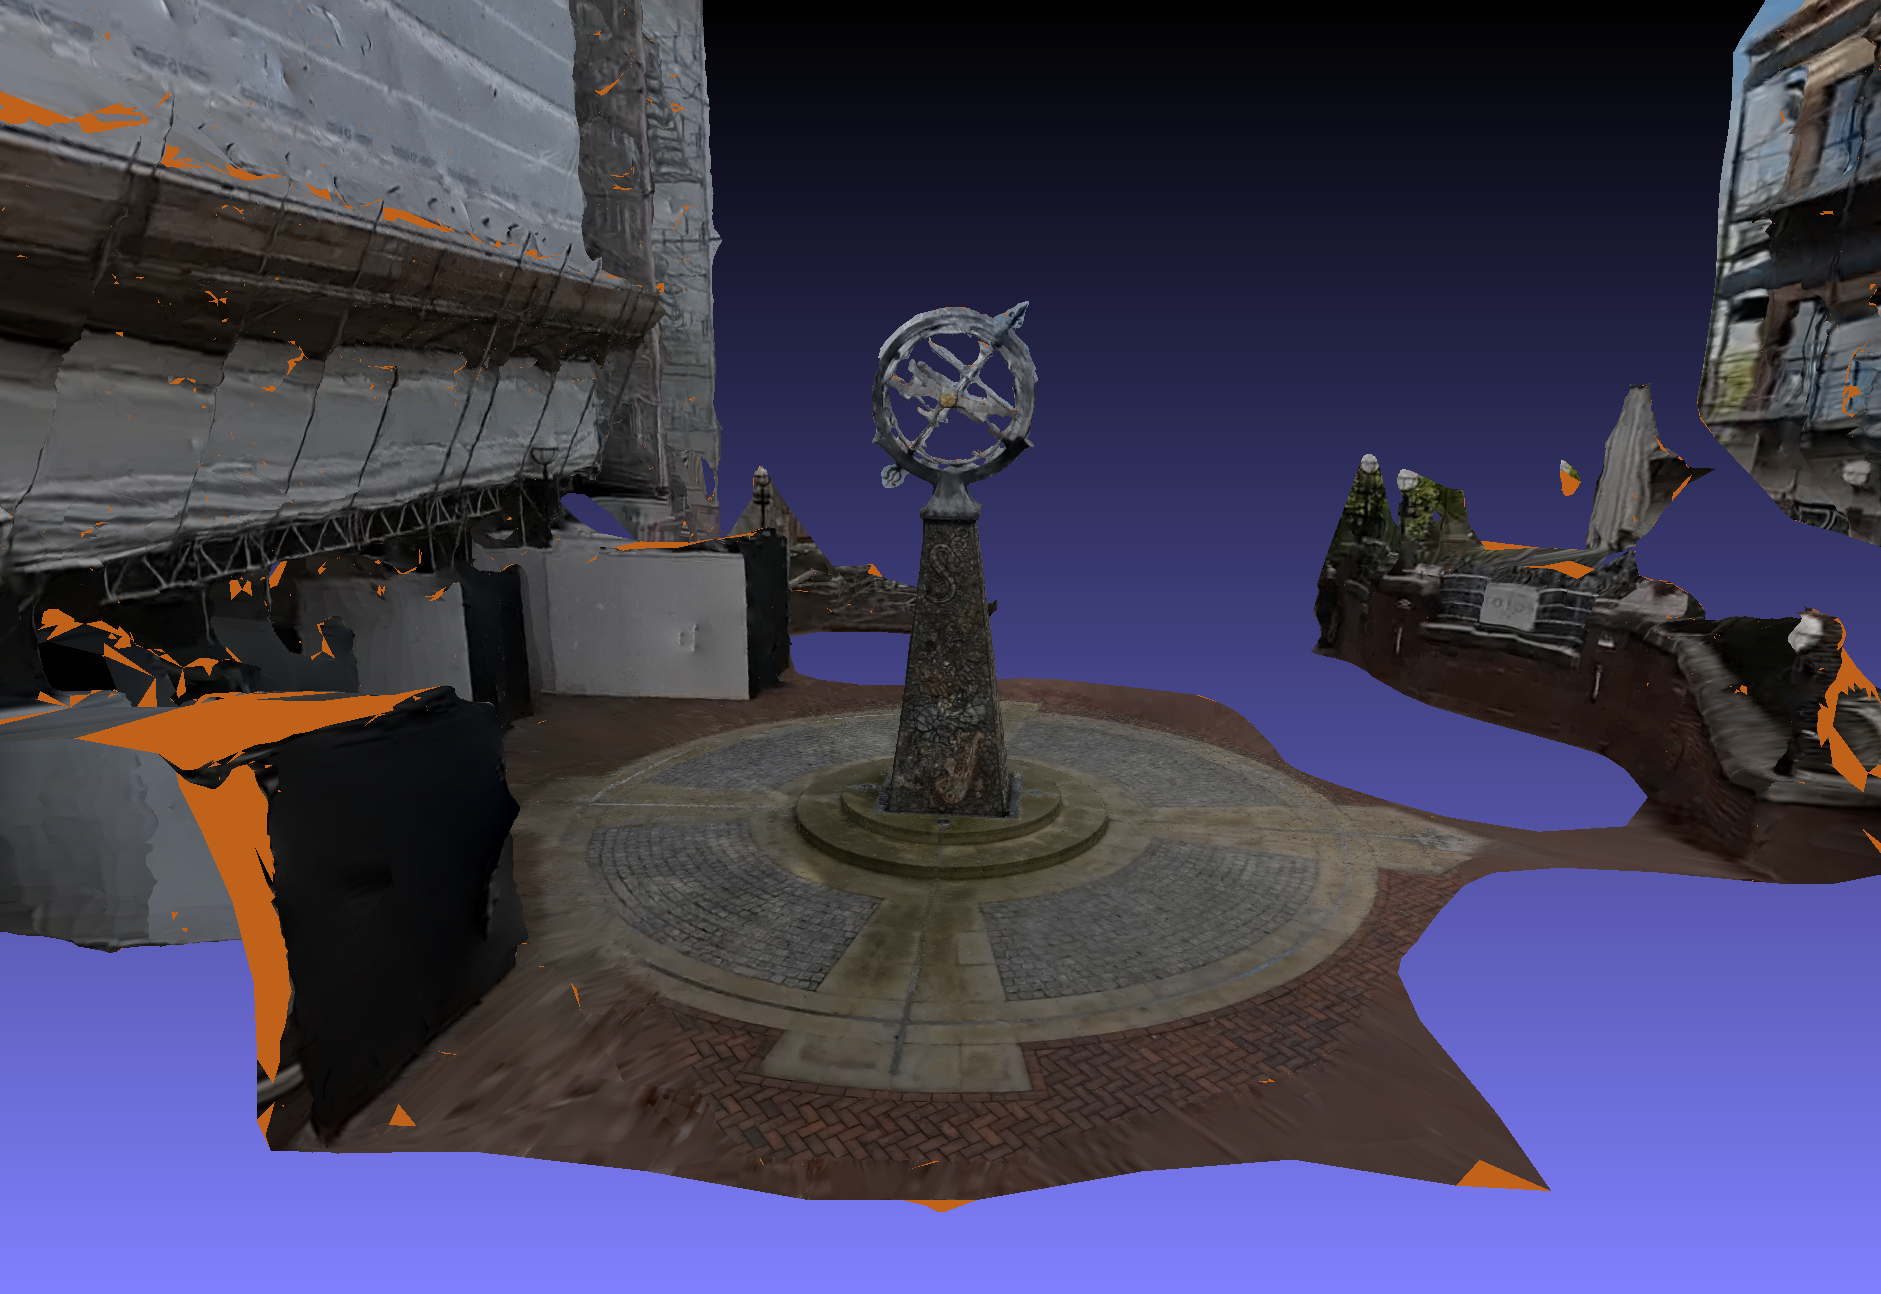
Textured Mesh
Summary
- COLMAP is a good open source tool for Structure from Motion and it works well in tandem with OpenMVS
- SLAM is an alternative approach to 3D reconstruction that has its own strengths and weaknesses
- 3D reconstruction can be slow and computationally expensive
References
- Johannes Lutz Schönberger and Jan-Michael Frahm, "Structure-from-Motion Revisited", IEEE/CVF Conference on Computer Vision and Pattern Recognition (CVPR), DOI 10.1109/CVPR.2016.445, 2016. pdf
- Johannes Lutz Schönberger, Zheng Enliang, Marc Pollefeys and Jan-Michael Frahm, "Pixelwise View Selection for Unstructured Multi-View Stereo", European Conference on Computer Vision (ECCV), DOI 10.1007/978-3-319-46487-9_31, 2016